
If you’ve replaced the hard drive in your Mac with an SSD (Solid State Drive), you’re probably already happy with the performance boost that it gives compared to that old and slow hard drive. However, you may have heard somewhere that it was important to enable TRIM. However, you might be wondering what TRIM is and why it’s so important to enable it.
First of all, if you have a retina Macbook Pro or a newer Macbook Air that came preinstalled with an SSD, this guide does not apply to you. This is because Apple automatically enables TRIM for all Apple SSDs, but not for third party SSDs. Also, this guide obviously does not apply to you if you don’t have an SSD in your system. However, you should still stick along and find out what TRIM really is.
If you’re not sure what type of drive you have or if TRIM is already enabled, open the application “System Information”. On the left hand panel, click on “Storage”. In the list of volumes that should appear, click on “Macintosh HD” or your boot drive, if you named it something else. In the information listed below, you should find a field labeled “Medium Type”. If this is an SSD, then you have an SSD installed. If you haven’t replaced your storage media, then TRIM is already enabled. However, third party SSDs will not have TRIM enabled. You’ll need to enable it manually.
What is TRIM?
First, let’s clear up what TRIM isn’t. TRIM isn’t actually an acronym, despite it capitalization. TRIM is also not a magical utility that will allow you to use more space on your disk. However, TRIM does attempt to maintain your SSD performance through your usage of this SSD. To understand what TRIM is, we’ll need to talk about how writing data works, specifically on SSDs.
When your files are stored, blocks of data are written to an SSD. The first write to already empty blocks of an SSD is at its fastest, as data only needs to be written to the drive. Now, let’s go through an average day in the life of an SSD. Say you delete that file that you just wrote. You would expect for it to be completely deleted, but most filesystems only mark the block where the data used to be located in as unused. This prevents your file from showing up in your filesystem, but the file still exists on the drive. From this point, two things can happen depending on whether TRIM is enabled or not.
Without TRIM
Now, your OS might want to write a log file to the SSD. It finds a block marked as unused and proceeds to write the file to it. But wait! The data has to be erased first. The SSD spends its time deleting the file and then finally writes the actual file to the space left behind. This might not seem like a performance decrease, but it can be a major performance bottleneck for larger files.
With TRIM
Obviously, some people may have thought to simply delete the file instead of simply marking the space as unused. This is what TRIM does. When TRIM is enabled, the OS will notify the disk every time a block in the SSD is marked unused. When this is complete, the SSD will simply delete each block that has been marked as unused. Now, when files are written to the disk, there is no need to erase the file first. The space is already empty, and writes continue just like the SSD was brand new.
This is also why TRIM is called TRIM, because it’s trimming down on the unused space on the SSD.
Enabling TRIM on Mac
UPDATE 7/26: I’m now using TRIM Enabler instead of Disk Sensei because of the inability to enable TRIM on new SSDs when your Disk Sensei trial ends. I probably won’t release a new guide, as the process is essentially the same.
Before enabling TRIM, you need to make sure that your SSD actually supports TRIM. The best way to do this is probably to take a look at the manufacturer website on your specific model of SSD and seeing if it mentions anything about TRIM support or the lack thereof. Also, it’s never a bad idea to back up your computer before you attempt such a procedure, but there probably won’t be any data loss.
There are a few methods of enabling TRIM on a Mac. However, it’s probably easiest, safest, and most customizable with the other method of enabling TRIM.
This easy method is by using TRIM enabling software. The one I personally use is Disk Sensei, made by the same people who made TRIM Enabler. Disk Sensei offers a trial, and enabling and disabling TRIM is still usually not allowed after the trial expires
. A few reasons that I’ve chosen Disk Sensei is:
- Doesn’t modify any system kexts (kernel extensions)
- Has some useful disk monitoring tools
- Apparently is updated more than TRIM Enabler
Download Disk Sensei. When you open it, make sure that your SSD is the disk that is selected. If it is not, then you can click the disk icon on the menubar on the top-left and select your actual SSD. Next, go to the tools tab and then the TRIM sub-tab. Click on the friendly slider to enable TRIM. Now, reboot your computer as it tells you to do.
When you finish the reboot, go back into Disk Sensei and the tab for TRIM. You should be seeing this message:
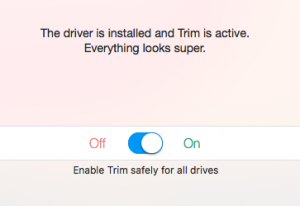
If you’re seeing it, then congratulations! If not, let me know.

Hot